If you are searching for the standard bookmark size, the practical starting point is 2 × 6 inches (50.8 × 152.4 mm). It is one of the most common printed bookmark formats, but it is not an official universal standard. A 2 × 7-inch or 2 × 8-inch bookmark may be more useful when you need extra vertical space, while a custom size can make more sense when the bookmark has to fit a specific book, product package, or insert system.
The right dimensions depend on more than the finished piece itself. You also need to consider how much information you are printing, whether the bookmark carries a QR code, how it will be handled, and, if it is going inside a package, how much usable space remains after the product and other inserts are in place.
What Is the Standard Bookmark Size?
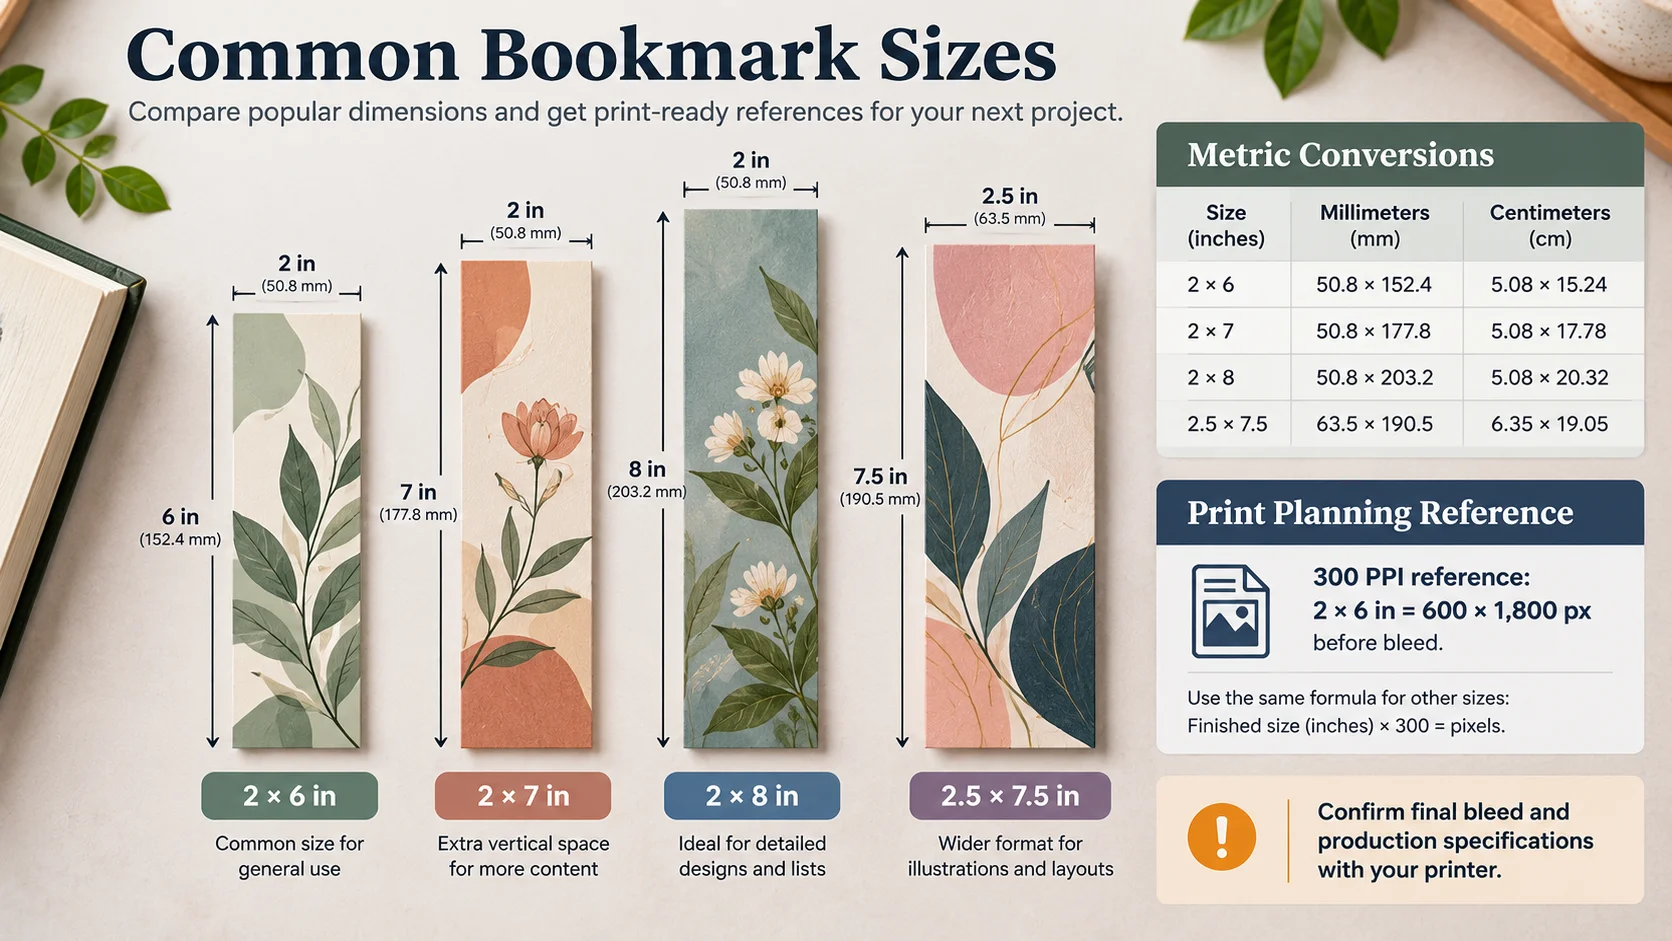
A common standard bookmark size is 2 × 6 inches (50.8 × 152.4 mm). That format is narrow enough to behave like a traditional bookmark while providing enough vertical space for a short message, illustration, brand mark, website, or QR code. Current printing references also list 2 × 7 and 2 × 8 inches among common alternatives.
There is no single official bookmark dimension that every printer or country must use. Treat 2 × 6 inches as a common starting point, then confirm the finished size and production specifications with the printer or packaging supplier handling the project.
Why Is 2 × 6 Inches So Common?
The appeal of 2 × 6 inches is the balance between a narrow physical footprint and enough surface area for useful printed content. The vertical proportion also makes the layout easy to organize: a visual or headline can lead, supporting information can sit below it, and a website or call to action can finish the piece.
- It has a familiar bookmark shape and a relatively small footprint.
- It provides enough room for simple branding without requiring a larger card.
- It works for many two-sided designs where the front is visual and the back carries supporting information.
- It can accommodate a QR code when the code is sized and tested appropriately.
- It is a useful baseline for comparison when a project later moves to a custom dimension.
Bookmark Dimensions: 2 × 6 vs. 2 × 7 vs. 2 × 8
Choosing between common bookmark dimensions is mostly a content-and-fit decision. More length can create breathing room, but it should not become an excuse to add unnecessary copy.
| Size | Best Fit | Main Advantage | Watch For |
|---|---|---|---|
| 2 × 6 in. | Traditional bookmark, simple promotion | Compact and familiar | Limited room for long copy |
| 2 × 7 in. | Branding + QR + short supporting copy | More vertical breathing room | Extra length may be unnecessary for a simple message |
| 2 × 8 in. | Reading challenges, schedules, checklists | Higher information capacity | Can feel oversized if the design is sparse |
| 2.5 × 7.5 in. | Illustration-heavy or wider layouts | More horizontal design space | Less like a conventional narrow bookmark |
| Custom | Packaging, special products, unusual formats | Optimized for the real application | Requires exact production confirmation |
How to Choose the Right Bookmark Size
Start with the job the bookmark has to perform, then work backward to the physical dimensions.
- Define the primary purpose. Is it simply marking a page, promoting a book, carrying a QR code, serving as a thank-you piece, or acting as a packaging insert?
- List the information that genuinely needs to appear. If the list becomes long, consider a larger format or a different printed piece instead of shrinking the type.
- Check the physical environment. For a book, consider page height and how far the bookmark should extend. For packaging, measure the usable interior space rather than the outside dimensions of the box.
- Choose a starting size. For many general-purpose projects, 2 × 6 inches is a practical baseline.
- Confirm production specifications. Finished size, bleed, safe area, stock, finishing, and file requirements vary by printer and project.
- Proof the physical result. A screen preview cannot tell you everything about how a bookmark will feel in a book or inside a package.
Bookmark Size for Different Uses
For Books, Authors, and Bookstores
A 2 × 6-inch format is often sufficient when the bookmark primarily needs a cover image, title, quote, author information, or a simple call to action. A longer format can provide more room for a reading list or promotional message.
For Libraries and Reading Programs
Libraries may need opening hours, a QR code, upcoming programs, reading goals, or a challenge checklist. In these cases, the extra vertical space of a 2 × 7 or 2 × 8 format can be more useful than squeezing everything into a traditional size.
For Personalized Photo Bookmarks
A photo-heavy bookmark benefits from a layout that protects the image’s proportions and keeps text readable. The finished size should be chosen after deciding whether the image is the main feature or one element within a broader branded design.
For Promotions and Small Businesses
A bookmark can work as a compact promotional piece, loyalty reminder, coupon, event handout, or branded freebie. If it will be handed out rather than stored in a book, you have more freedom to choose a custom proportion, but it should still feel purposeful rather than like a squeezed-down flyer.
Can a Bookmark Be Used as a Packaging Insert?
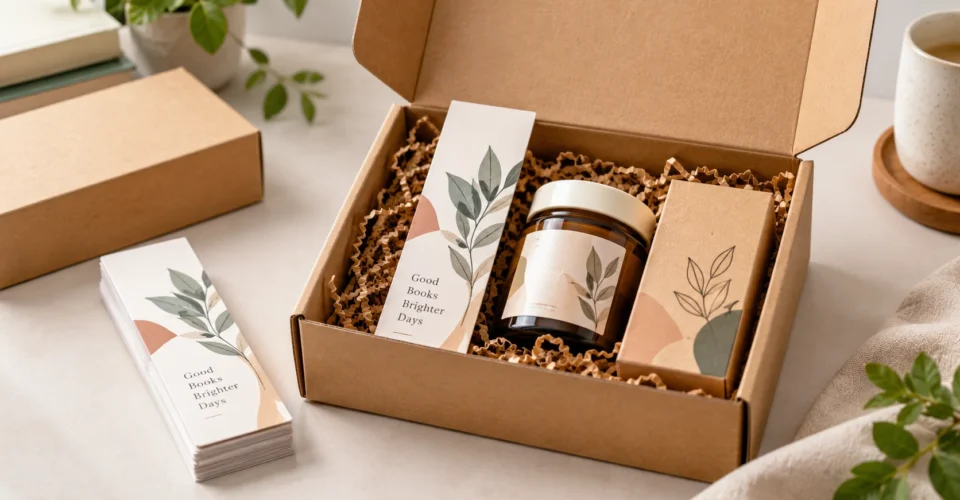
Yes. A bookmark can serve as a packaging insert when its format and message are useful to the recipient. For example, a book brand can place a reading bookmark inside an order, while a stationery, gift, or lifestyle brand can use a bookmark-shaped printed piece for a thank-you message, QR code, promotion, or educational content.
The important distinction is that “bookmark” describes the physical format and intended use, while “packaging insert” describes the role the printed piece plays inside a package. A bookmark can therefore be one type of insert without being the only insert format.
If the bookmark is part of a larger branded unboxing experience, start by understanding the broader custom packaging system.
Bookmark Size for Packaging Inserts
When a bookmark goes inside a custom box, do not size it from the outside of the package. Start with the usable interior space after accounting for the product, protective material, structural inserts, and any other printed pieces.
| Packaging Question | Why It Matters | What to Check |
|---|---|---|
| Where will the bookmark sit? | Placement affects the available footprint. | Above product, beside product, under lid, or in an insert pocket |
| What else is inside? | Other components reduce usable space. | Product, tissue, foam, cardboard insert, thank-you card |
| Does it need to be removed easily? | A tight fit can damage corners or make unboxing awkward. | Clearance around edges and any pull area |
| Will it bend? | Flexible paper may need a protected location. | Product pressure, insert walls, and stacking |
| Is the package shipped? | Movement can change how the piece behaves. | Interior clearance and secure placement |
How Bookmark Dimensions Work With Custom Box Dimensions
A bookmark that fits a book may not be the best size for a box. Packaging decisions should be based on the finished interior dimensions of the package and the actual footprint of the product.
Before finalizing the bookmark, review the custom box dimensions guide so the printed piece is considered alongside the product and the available interior space.
A useful rule is to treat the bookmark as one component of the complete package rather than as an isolated printed item. If the bookmark is intended to slide into a pocket, for example, the pocket and the bookmark need to be designed together. If it sits loose above the product, the package may need a different interior layout to keep the bookmark flat and easy to find.
Bookmark Placement Inside Packaging
- On top of the product: highly visible and useful when the bookmark is part of the first unboxing impression.
- Beside the product: practical when the box has extra horizontal space or a dedicated compartment.
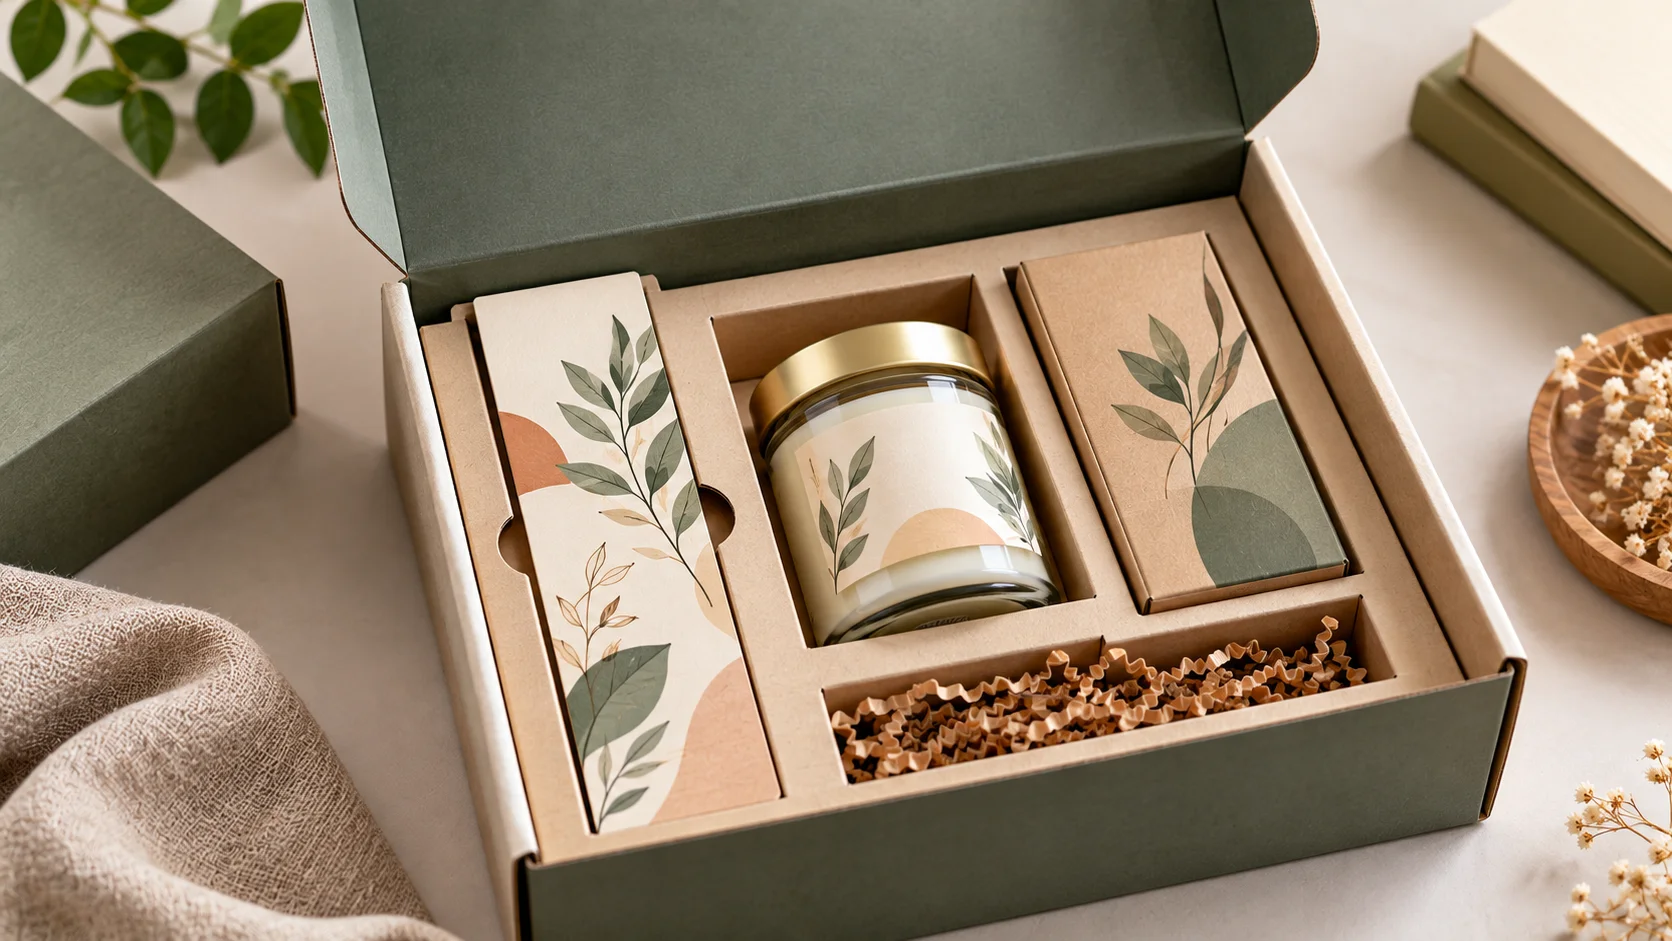
- Inside a cardboard insert pocket: useful when the package needs a defined location for the printed piece.
- Under the lid: appropriate for short messages, brand stories, or a simple QR-driven experience.
- With a gift package: useful for thank-you messages, reading-related gifts, or promotional content.
For ecommerce orders, a purpose-built mailer format can be planned around the product and printed inserts together.
Bookmark Size for Ecommerce Packaging
Ecommerce packaging adds another constraint: the bookmark must work after the package is assembled and during shipping. A large bookmark can be attractive on screen but inconvenient if it presses against the product, catches on protective material, or has no defined place inside the box.
- Measure the usable interior dimensions, not the exterior box size.
- Account for the product’s actual footprint and any protective components.
- Decide whether the bookmark should be loose, pocketed, or retained by an insert.
- Keep important printed elements away from areas that may rub against the box or product.
- For multi-piece orders, check the bookmark against the largest realistic product combination rather than a single-item sample.
Bookmark Size and Cardboard or Corrugated Inserts
Cardboard inserts and corrugated inserts can create dedicated spaces for printed pieces, but they also reduce the free interior area. If the bookmark is intended to sit in an insert, define the finished bookmark dimensions before the insert pocket or slot is finalized.
This is particularly important for packaging that uses multiple components. A bookmark, thank-you card, product guide, and promotional insert can each seem small on their own but become difficult to place when combined with the product and protective packaging.
If you are planning the box and insert as one system, the full packaging-box solution is the natural commercial next step.
Bookmark Size for Different Box Styles
| Packaging Type | Bookmark Consideration | Planning Priority |
|---|---|---|
| Tuck-end box | Use the available interior footprint without interfering with closure. | Flat placement and easy removal |
| Folding carton | A compact bookmark can sit above or beside the product. | Interior clearance and presentation |
| Mailer box | The bookmark should survive handling and remain visible after opening. | Unboxing and secure placement |
| Rigid box | More structured interiors can support a dedicated insert position. | Presentation and compartment planning |
| Collapsible rigid box | Consider how the package is assembled and where the printed piece rests. | Flat storage and final fit |
| Luxury product box | A bookmark can become part of a premium printed story or brand experience. | Material, finish, and presentation |
For structured presentation packaging, rigid boxes with built-in insert support can be evaluated alongside the printed piece.
Bookmark Printing Specifications
Finished dimensions are only one part of a print-ready bookmark. The artwork also needs to account for bleed, trim, safe areas, image resolution, color handling, and the printer’s file requirements.
Bleed
A 0.125-inch (1/8-inch) bleed is a common production value used by bookmark-printing references, but bleed is not a universal rule for every printer. Use the exact bleed specified by the printer producing the job. If a background or image reaches the finished edge, it should extend through the required bleed area so trimming does not leave an unintended white edge.
Trim and Safe Area
The trim size is the finished bookmark size after cutting. Keep important text, logos, QR codes, and critical image details away from the trim line according to the printer’s safe-area specification. Do not assume that a generic safe-zone number applies to every production method.
Resolution and Pixels
For raster artwork, 300 PPI is a common target for high-quality print imagery. Adobe’s current guidance identifies 300 PPI as a standard high-quality print resolution, while also noting that requirements vary with the printing process and viewing conditions.
At 300 PPI, a 2 × 6-inch finished area corresponds to 600 × 1,800 pixels before any extra artwork required for bleed. The formula is simple: physical inches × PPI = pixels.
| Finished Size | 300 PPI Pixel Size | Planning Note |
|---|---|---|
| 2 × 6 in. | 600 × 1,800 px | Common baseline |
| 2 × 7 in. | 600 × 2,100 px | Extra vertical space |
| 2 × 8 in. | 600 × 2,400 px | Longer informational format |
| 2.5 × 7.5 in. | 750 × 2,250 px | Wider visual layout |
Paper, Cardstock and Finishing
A bookmark is handled repeatedly, so stock and finishing should be chosen for the intended use rather than copied from a generic template. Printing references commonly discuss heavier cover stocks such as 14pt–18pt and finishing options such as lamination, rounded corners, foil, and spot UV. Exact stock names and available finishes vary by printer.
- Cardstock or cover stock: a practical starting point for a piece that needs more stiffness than a flyer.
- Matte or gloss lamination: useful when the project needs added surface protection or a particular finish.
- Soft-touch finish: a premium tactile option where available.
- Rounded corners: an aesthetic and handling choice; confirm the printer’s available radius and production method.
- Foil or spot UV: best treated as selective accents rather than requirements for every bookmark.
- Uncoated stock: useful when a natural paper feel or writable surface matters.
When the bookmark is being developed alongside other printed packaging components, review the packaging material options so the printed piece and package use compatible materials and finishes.
Should a Bookmark Be Printed on Both Sides?
Not necessarily, but double-sided printing can make a small format much easier to organize. One side can carry the primary visual while the other handles a QR code, short offer, website, reading list, or supporting message.
- Front: main visual, title, quote, or brand message.
- Back: QR code, website, offer, reading list, or supporting information.
- Avoid repeating the same message on both sides unless repetition serves a specific purpose.
- Check front/back orientation with the printer’s template before production.
How Much Information Fits on a Bookmark?
Less than many people expect. A bookmark is physically narrow, so adding more content often makes the piece harder to read rather than more useful.
A simple promotional bookmark might contain:
- A brand or book name
- One strong visual
- One short message
- A QR code with a clear reason to scan
- A website or concise call to action
If the content requires several paragraphs, detailed instructions, or multiple product descriptions, a folded insert, postcard, or booklet may be a better format.
Bookmark vs. Other Printed Packaging Inserts
| Format | Information Capacity | Space Requirement | Best Use |
|---|---|---|---|
| Bookmark | Low–medium | Low | Reading, brand reminder, QR-driven message |
| Flat insert card | Low–medium | Low | Thank-you note, short promotion |
| Postcard | Medium | Medium | Promotion or product message |
| Folded insert | High | Medium | Instructions, product education, multi-part story |
| Booklet | Very high | Higher | Detailed education or multi-product information |
The right format depends on the amount of information, how the recipient will use it, and how much package space is available. A bookmark is valuable precisely because it remains compact; if the message overwhelms that compact format, another insert type may be more appropriate.
How to Design a Bookmark for Printing
1. Build Around the Finished Size
Set the artboard to the finished dimensions first. Then add the printer’s required bleed rather than guessing the final production size from a pixel-only canvas.
2. Design for the Vertical Shape
Use a visual hierarchy that respects the narrow format. A common structure is a dominant image or title at the top, the main message through the middle, and a concise action or destination toward the bottom.
3. Keep Critical Content Away From the Edge
Do not place text, QR codes, logos, or important illustration details where trimming, rounding, punching, or finishing could interfere.
4. Test the QR Code at Final Size
If a QR code is part of the design, print or physically test it at the intended size. A QR code that scans on a large monitor may behave differently on the finished printed piece.
5. Proof the Physical Piece
A physical proof reveals issues that are easy to miss on screen: type that feels too small, an image that looks too dark, a QR code that is awkwardly placed, or a bookmark that does not sit correctly in the intended package.
Bookmark Size Planning Tool
Use this tool as a planning aid before creating final artwork. It converts a chosen finished size into metric units and 300-PPI pixel dimensions and can add a planning bleed. The output is a reference, not a printer-specific production template.
Common Bookmark Design Mistakes
- Choosing a size before deciding what the bookmark actually needs to communicate.
- Treating 2 × 6 inches as a mandatory standard rather than a common starting point.
- Designing from pixels without first defining the finished physical dimensions.
- Putting text or QR codes too close to the trim edge.
- Using a low-resolution raster image and assuming that enlarging it will create missing detail.
- Filling every available area with copy.
- Forgetting to test the front/back orientation.
- Designing the bookmark separately from the package when it will actually be used as an insert.
- Finalizing an insert pocket before confirming the finished bookmark dimensions.
When Should You Choose a Custom Bookmark Size?
Choose a custom dimension when the standard format does not solve the physical or communication problem. That can happen when the bookmark must fit a particular product box, match a book series, carry a specific visual composition, fit a dedicated insert pocket, or work as part of a larger printed packaging system.
Custom does not automatically mean larger. A custom bookmark can be smaller, wider, shorter, or proportioned around the available package space. The important part is that the finished dimensions are intentional and confirmed before production.
For a bookmark that needs to become part of a product-specific package, made-to-fit product packaging can be planned around the finished product and printed insert dimensions.
Bookmark Size for Gift and Premium Packaging
A bookmark can also be part of a gift or premium packaging experience. In that situation, the printed piece may carry a short story, care message, thank-you note, or QR code instead of functioning only as a traditional reading aid.
When the packaging is intended to feel more gift-oriented, custom gift packaging can be considered alongside the bookmark’s size, material, and placement.
A Practical Bookmark Size Checklist
- ☐ Define the purpose of the bookmark.
- ☐ Choose a starting finished size.
- ☐ Confirm the actual available book or package space.
- ☐ Decide what information belongs on the front.
- ☐ Decide what information belongs on the back.
- ☐ Confirm QR-code requirements if applicable.
- ☐ Confirm bleed and safe-area specifications with the printer.
- ☐ Prepare raster images at an appropriate final resolution.
- ☐ Confirm stock and finishing.
- ☐ Check front/back orientation.
- ☐ Physically proof the bookmark.
- ☐ Test the bookmark inside the intended box or insert before a large production run.
Frequently Asked Questions About Bookmark Size
What is the standard bookmark size?
2 × 6 inches (50.8 × 152.4 mm) is one of the most common bookmark formats. It is a common industry starting point, not a universal official standard.
What are typical bookmark dimensions?
Common printed formats include 2 × 6, 2 × 7, and 2 × 8 inches, with wider or custom formats available for different designs and uses.
What is the average bookmark size?
There is no single average that applies to every printer or use. For practical planning, 2 × 6 inches is a widely used baseline.
Is 2 × 6 inches a good bookmark size?
Yes, when you need a conventional, compact bookmark with enough space for a simple visual, message, website, or QR code. If the content is longer, consider a taller format.
What is a bookmark size in centimeters?
A 2 × 6-inch bookmark is 5.08 × 15.24 cm.
What is a 2 × 6 bookmark size in pixels?
At 300 PPI, the finished 2 × 6-inch area corresponds to 600 × 1,800 pixels before adding any required bleed.
How much bleed does a bookmark need?
A 1/8-inch (0.125-inch) bleed is commonly used in bookmark-printing references, but the printer’s current production specification should control the final file.
What resolution should I use for a bookmark?
300 PPI is a common target for high-quality raster print imagery. Exact requirements can vary by printer and production method.
Can I print a bookmark in a custom size?
Yes. Custom dimensions are useful when the bookmark must match a particular design, book, product, or packaging insert.
Can a bookmark be used as a packaging insert?
Yes. A bookmark can function as a packaging insert when it provides useful information, a thank-you message, a QR-driven experience, or another reason for the recipient to keep it.
How do I choose a bookmark size for a custom box?
Start with the usable interior space, then account for the product, protective material, structural inserts, and other printed pieces. Finalize the bookmark and its placement together with the package.
What cardstock is good for bookmarks?
A cover/cardstock material is generally more appropriate than lightweight flyer paper when the bookmark will be handled repeatedly. Exact stock should be selected according to the printer’s available materials and the intended use.
Should a bookmark be double-sided?
It can be. Double-sided printing is useful when one side needs to carry the main visual and the other needs to carry a QR code, offer, website, reading list, or supporting information.
Final Takeaway: Choose the Bookmark Size Around the Job
For a conventional bookmark, start with 2 × 6 inches. Move to 2 × 7 or 2 × 8 inches when the design genuinely needs more vertical room, and use a custom size when the physical environment calls for something different.
If the bookmark is going inside a product package, the decision changes slightly: the box, product, insert structure, and printed piece should be planned as one system. The best bookmark size is the one that remains readable and useful while fitting comfortably into the real package.
If you are ready to plan the complete box-and-insert system, explore custom packaging and box solutions and size the printed piece around the finished package rather than treating it as an afterthought.